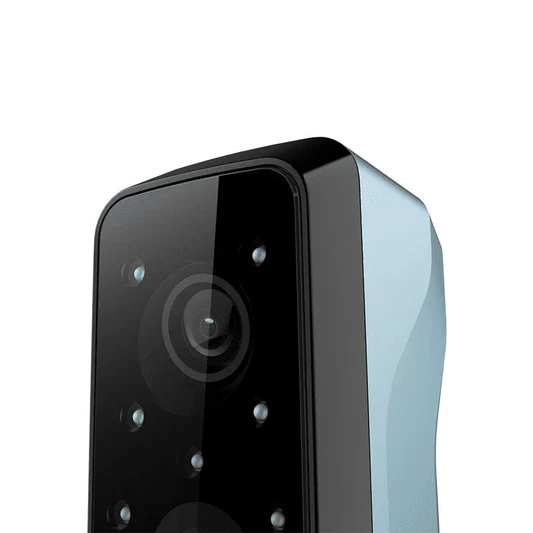
Creating detailed 3D models for printing has become more accessible and accurate with the advent of 3D scanners. Whether you are a hobbyist, an artist, or an engineer, leveraging a 3D scanner can significantly enhance your 3D printing projects. This comprehensive guide will walk you through the process of using a 3D scanner to create high-quality 3D models, ready for printing.
Understanding the Basics of 3D Scanning
Before diving into the creation process, it’s essential to understand what a 3D scanner is and how it works. A 3D scanner captures an object’s physical geometry and converts it into a digital 3D model. It uses various technologies, such as laser triangulation, structured light, or photogrammetry, to capture precise details of the object’s surface.
Choosing the Right 3D Scanner
- Resolution and Accuracy: Higher resolution and accuracy are vital for capturing fine details, especially for intricate designs.
- Ease of Use: User-friendly scanners with intuitive software can streamline the scanning process.
- Portability: A portable scanner may offer more flexibility depending on your needs.
- Compatibility with Your 3D Printer: Ensure the scanner’s output is compatible with your 3D printer’s software.
Preparing the Object for Scanning
- Clean the Object: Remove any dust, dirt, or smudges from the object’s surface.
- Matte Finish: Shiny or transparent objects can be challenging to scan. Apply a matte spray to such surfaces to improve scan quality.
- Stable Positioning: Place the object on a stable surface where it won’t move during the scanning process. Using a turntable can be beneficial for scanning from multiple angles.
Setting Up Your 3D Scanner
Once your object is ready, set up your 3D scanner according to the manufacturer’s instructions. Position the scanner to cover the entire object without missing any parts. Calibration is often required to ensure accuracy, so follow the calibration steps meticulously.
Scanning the Object
Now, you’re ready to scan. Here’s a step-by-step guide:
- Initial Scan: To capture the object’s overall shape, perform an initial scan. This scan will provide a rough model.
- Detail Scans: Conduct multiple scans from different angles to capture fine details. This process is crucial for intricate parts of the object.
- Combining Scans: Use the scanner’s software to combine the multiple scans into a single, detailed 3D model. This step may involve aligning and merging different scans accurately.
Post-Processing the 3D Model
After scanning, the raw 3D model may require some post-processing to ensure it’s ready for printing. This process typically involves:
- Cleaning the Mesh: Remove any noise or artifacts from the scanned data.
- Repairing Holes: Fill in any gaps or holes in the model to create a watertight mesh.
- Smoothing and Refining: Use smoothing tools to refine surfaces and enhance details.
- Scaling and Positioning: Ensure the model is scaled correctly and positioned optimally for printing.
Choosing the Right Software
Several software options are available for post-processing scanned models. Popular choices include:
- MeshLab: An open-source tool for cleaning and processing 3D scans.
- Blender: A powerful, free 3D modelling software with extensive post-processing capabilities.
- ZBrush: Known for its advanced sculpting tools, ideal for detailed refinement.
Exporting the Model for 3D Printing
Once the 3D model is refined, it’s time to export it for printing. Ensure the file format is compatible with your 3D printer (commonly STL or OBJ). Before exporting, double-check the model for any errors that might affect the printing process.
Printing the 3D Model
With your detailed 3D model ready, you can proceed to the printing stage. Here are some tips for successful 3D printing:
- Choose the Right Material: Select a material that suits your project’s requirements. Standard options include PLA, ABS, and resin.
- Optimize Print Settings: Based on the complexity of the model, adjust print settings such as layer height, print speed, and support structures.
- Monitor the Print: Keep an eye on the printing process to catch any issues early.
Post-Processing the 3D Print
After printing, some post-processing may be required:
- Removing Supports: Carefully remove any support structures used during printing.
- Sanding and Smoothing: Sand the printed object to achieve a smooth finish.
- Painting and Finishing: Apply paint or other finishes to enhance the appearance of the printed model.
Conclusion
Using a scanner to create detailed 3D models for printing is a transformative process that enhances the precision and quality of your projects. You can achieve impressive results by carefully selecting a 3D scanner, preparing your object, and following systematic scanning and post-processing steps. Investing in the right equipment, considering factors like 3D printer price and scanner compatibility can set you on the path to creating stunning, high-detail 3D prints.


More Stories
Using a Virtual Office for Your GST Registration
Hellstar Hoodie has become an iconic piece in
Why Should Consider Buying Dog Supplements